Personal Finance Tracker
Personal Finance Tracker
This is a flutter project aimed at helping individuals manage their financial operations. You can check the project online in this address. The code repository is located in here.
Functional Requirements
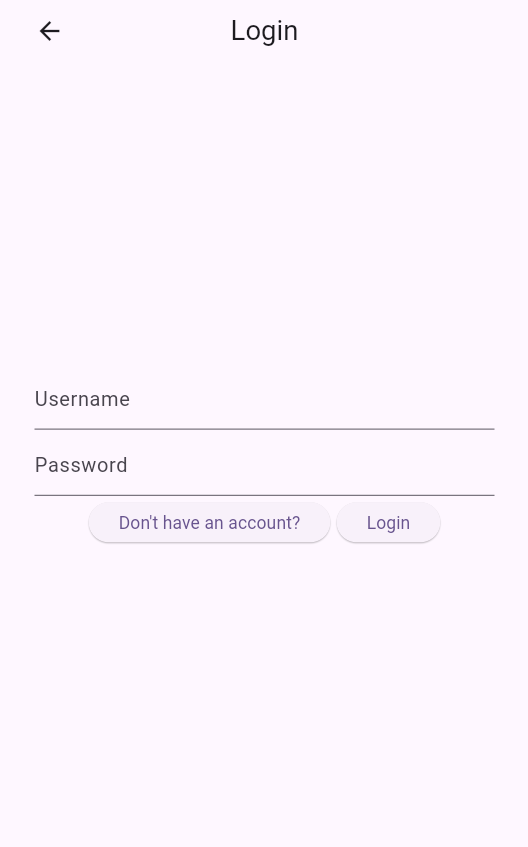
First, the project includes accounting functionalities. These requirements include register, login, and logout. After opening the application, if the individual is not logged in, they will be redirected to the login page, located in /account. At that page, if they have not created an account before, they will be redirected to the registration page. After registration or logging in, the individuals will be redirected to the dashboard page. Moreover, after logging in, the individual always has the chance to logout on the top right of the dashboard page.
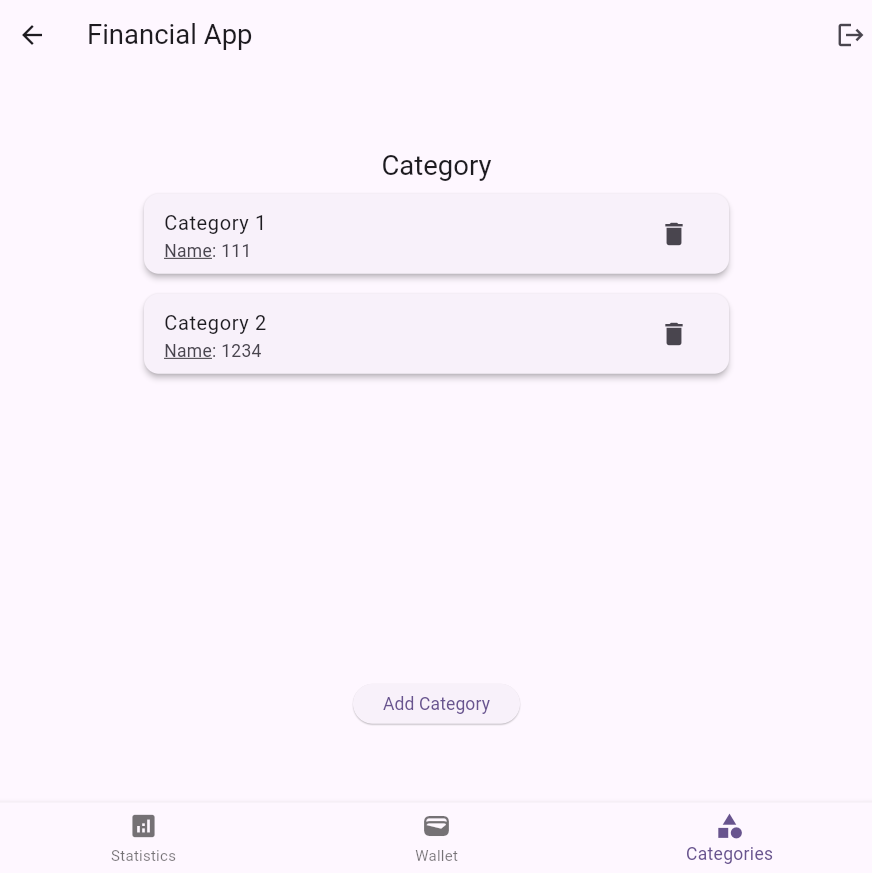
Second, there are requirements related to categories. These include adding and retrieving categories. The individual can access these requirements on the “Category” tab of the dashboard.
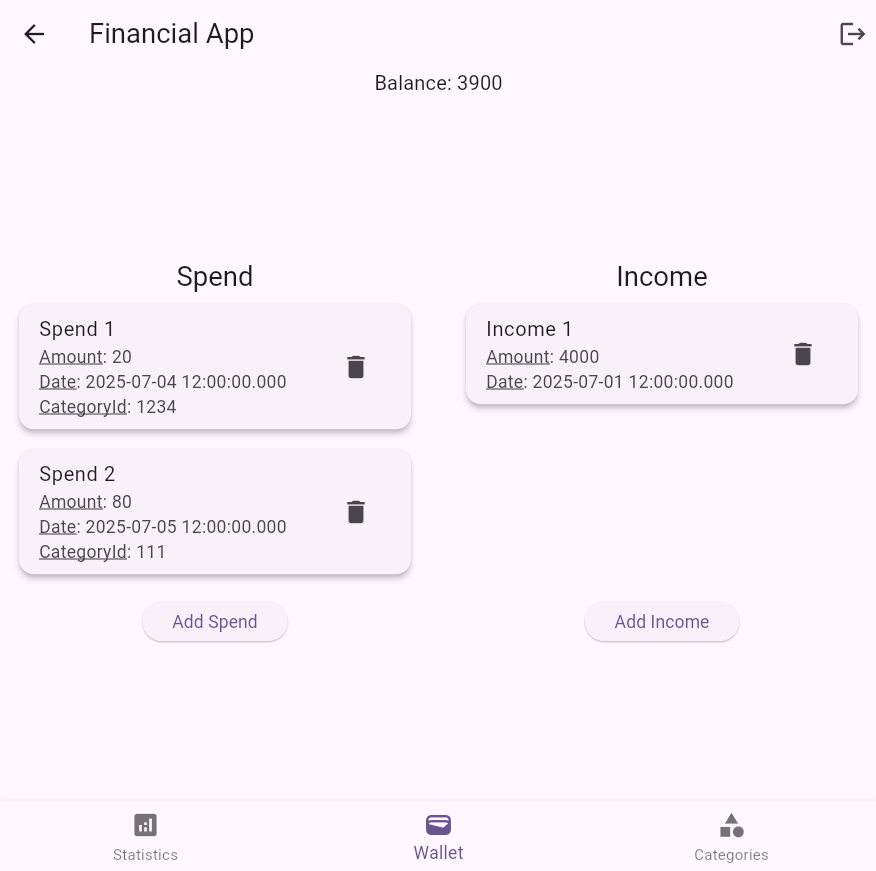
Third, there are requirements related to incomes and spends. Each Income can have a special date and an amount. They represent each income the individual received. The spends are similar to income, but they represent the amount of money the individual has spent. In addition, they have a certain category. The individual can add and retrieve spends and incomes on the Wallet tab of the dashboard.
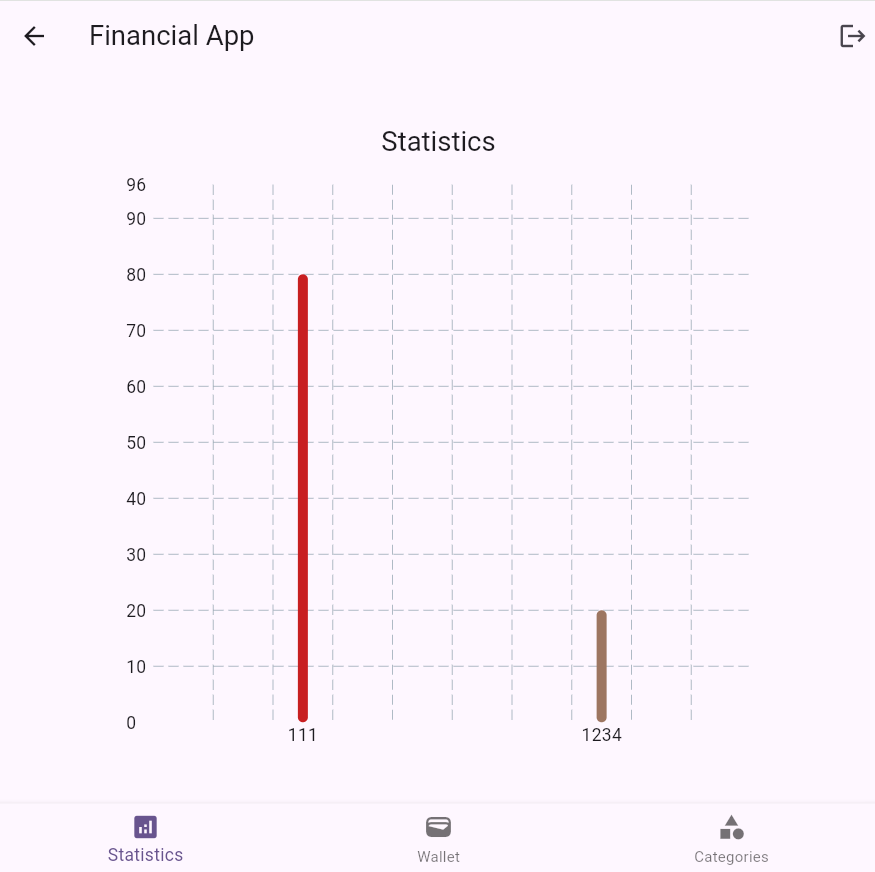
Finally, there are requirements related to the statistics. These can be accessed through the statistics tab of the dashboard. At the moment, the only requirement in this tab, which you can access through the statistics tab, is seeing a bar chart of total spent per category.
UI Constraints
The dashboard is responsive. Each subpage on the dashboard has two width breakpoints, mobile and tablet. mobile is any width below 500px and tablet is any width bigger than 500px.
Moreover, there are forms if needed. The forms remember the states and forget them as soon as the functionality is conducted.
Furthermore, there are four navigated screens. One of them, the screen responsible for accounting, has a path variable.
A Short User Manual
First, open the application using the provided URL.
Creating An Account
The page snapshot is shown in the picture below. At first, you will be redirected to the login page. Navigate to the registration page using the button “haven’t created an account yet?”. Then, create a new account and password and click the button “register”. then, you will be redirected to the dashboard page automatically.
Adding Categories
The page snapshot is shown in the picture below. When on the dashboard page, press the “Categories” button on the bottom right of the page, to be redirected to the categories page. Thereafter, click on the add button on the page, so that a model pops up at the bottom of the page, providing an input for the name of the category. Provide a unique name for the desired category and click “add”. then, the category is added and shown in the “Categories” page.
Adding Incomes
The page snapshot is shown in the picture below. First, navigate to the wallet page using the middle button of the bottom navigation bar. Then, you can see the incomes widget on the right section of the page when you are using a tablet mode, or the bottom when you are using a mobile mode. Press add on that section. Thereafter, a modal pops up with an input form asking you to add the required information of the added income. you can avoid selecting the datetime and if you do, the datetime will be set datetime.now(). Moreover, you can add the income and see it on the collection. The balance will also update if you add it.
Adding Spend
The page snapshot is shown in the picture below. First, navigate to the wallet page using the middle button of the bottom navigation bar. Then, you can see the spends widget on the left section of the page when you are using a tablet mode, or the top when you are using a mobile mode. Press add on that section. Thereafter, a modal pops up with an input form asking you to add the required information of the added spend. you can avoid selecting the datetime and if you do, the datetime will be set datetime.now(). However, the amount and categoryId are required. and the categoryId is the name of the desired category that you have added before. In addition, the amount should be less than the current balance, so that your balance will not be negative. Moreover, you can add the spend and see it on the collection. The balance will also update if you add it.
Visiting the statistics part
The page snapshot is shown in the picture below. After adding your desired spends and categories, you can see how much have you have spent on each category. This is the first bar chart you will visit when you press the “statistics” button on the bottom left of dashboard.